When it comes to enhancing the entrance of your property, a well-crafted gate can make a significant impact. As an experienced Wyoming fence company, we’ve watched people struggle with gate construction, so we’re here to teach you the secrets of building the perfect cedar wood gate.
In this article, we share tricks of our trade for the most effective and simple process of constructing a gate for your Wyoming wood fence using Postmaster posts, highlighting their advantages and providing step-by-step instructions that go along with one of our helpful video tutorials to help you create a stunning and long-lasting entrance for your property.
Understanding the Benefits of a Cedar Wood Gate
Cedar wood is a popular choice for outdoor projects due to its natural beauty and remarkable properties. It is known for its resistance to decay, rot, and insect damage, making it ideal for the long-term durability of your wood fence gate. Additionally, cedar’s natural oils provide protection against harsh weather conditions, ensuring that your Wyoming wood fence gate will stand the test of time. SWi Fence & Supply specializes in supplying cedar wood fence products and we’re happy to help answer your questions about your project.
The Advantages of Postmaster Posts
Postmaster posts are an innovative alternative to traditional wooden posts. Made from high-quality steel, they offer exceptional strength and stability. These posts are designed to be hidden within the wooden structure, providing a sleek and seamless appearance while offering superior structural support. The combination of cedar wood and Postmaster posts results in a gate that is not only visually appealing but also highly durable.
There are some unique factors to take into consideration when you Postmaster posts. People wonder, “Do you need to do anything different when you’re using postmaster posts?” The answer is yes, but just ever so slightly. Although some people choose to double up posts when using postmaster posts, we find that unnecessary because since your gate is closed the large majority of the time, the strength is in a direction that makes it perfectly fine to use one post. However, SWi Fence & Supply does carry and supply some special posts that we provide as a trusted Wyoming fence company made specifically for gates if needed.
Materials and Tools Required
To begin building your cedar wood gate with Postmaster posts, gather the necessary materials and tools. This includes cedar boards, Postmaster posts, cedar gate hardware, carriage bolts, screws, strap hinges, paddle latches, tension bars, a drill, a saw, a level, measuring tape, a bump board (“straightaway,”), and a post hole digger.
Postmaster Posts
Determine the appropriate placement and dig holes for the posts using a post-hole digger. Insert the posts, ensuring they are level and securely anchored.
Cut a 2×4 piece of wood to fit the gap in the Postmaster post and fill it so that the hinges don’t roll to create a nice level gate. Draw a line on the 2×4 where it needs to be cut so that it can fit into the Postmaster post and then use a saw to cut it. It fits in as a gap filler and will not be bearing any weight.
Use inch and seven-eighths ring stainless steel shank nails to attach the wood gap fill piece to the Postmaster post to avoid bleeding down the pickets. Now, secure the gate frame to the posts using screws or brackets designed for this purpose.
Build the Rails & Brace
The next step is what we call “build in place.” Building our rails exactly where they’re going to make the process simple.
Measure where each post is located, mark it and attach the top, middle, and bottom rails to the gate posts.
Now, build a brace, which can get a little tricky. The brace always goes up away from the hinges. When building a gate, the brace angle cannot fall below 45 degrees. When it falls below 45 degrees, a different way to brace needs to be considered such as two diagonals. You can use a square to check the angle. Any time it exceeds 45 degrees, you have a tension brace instead of a compression brace, and it’s not doing its job. The brace needs to be able to support the weight of the gate.
Attach the pickets
With the gate frame and posts in place, add the cedar boards to complete the gate’s structure. Normally we use a bump board to ensure they are straight. As an expert Wyoming fence company, we recommend a product called a “straightaway” which works really well for lining up the picket tops on the gate so a string isn’t needed to do that job.
Now, attach the pickets. Use a table saw to trim pickets if we need to fit them into smaller spaces left over at the end. A picket will need to be trimmed if the gate width isn’t exactly 48 inches or the standard width. You can trim two pickets to fit the gap instead of cutting one picket because this will visually look more appealing.
Attach the Hinge
If you have a slope or hill in the area where your gate is located, it’s crucial to hinge off of the low post to avoid the gate meeting the ground as it swings open and closed. If your gate is very close to the ground, you might have to trim the bottom, which works out fine.
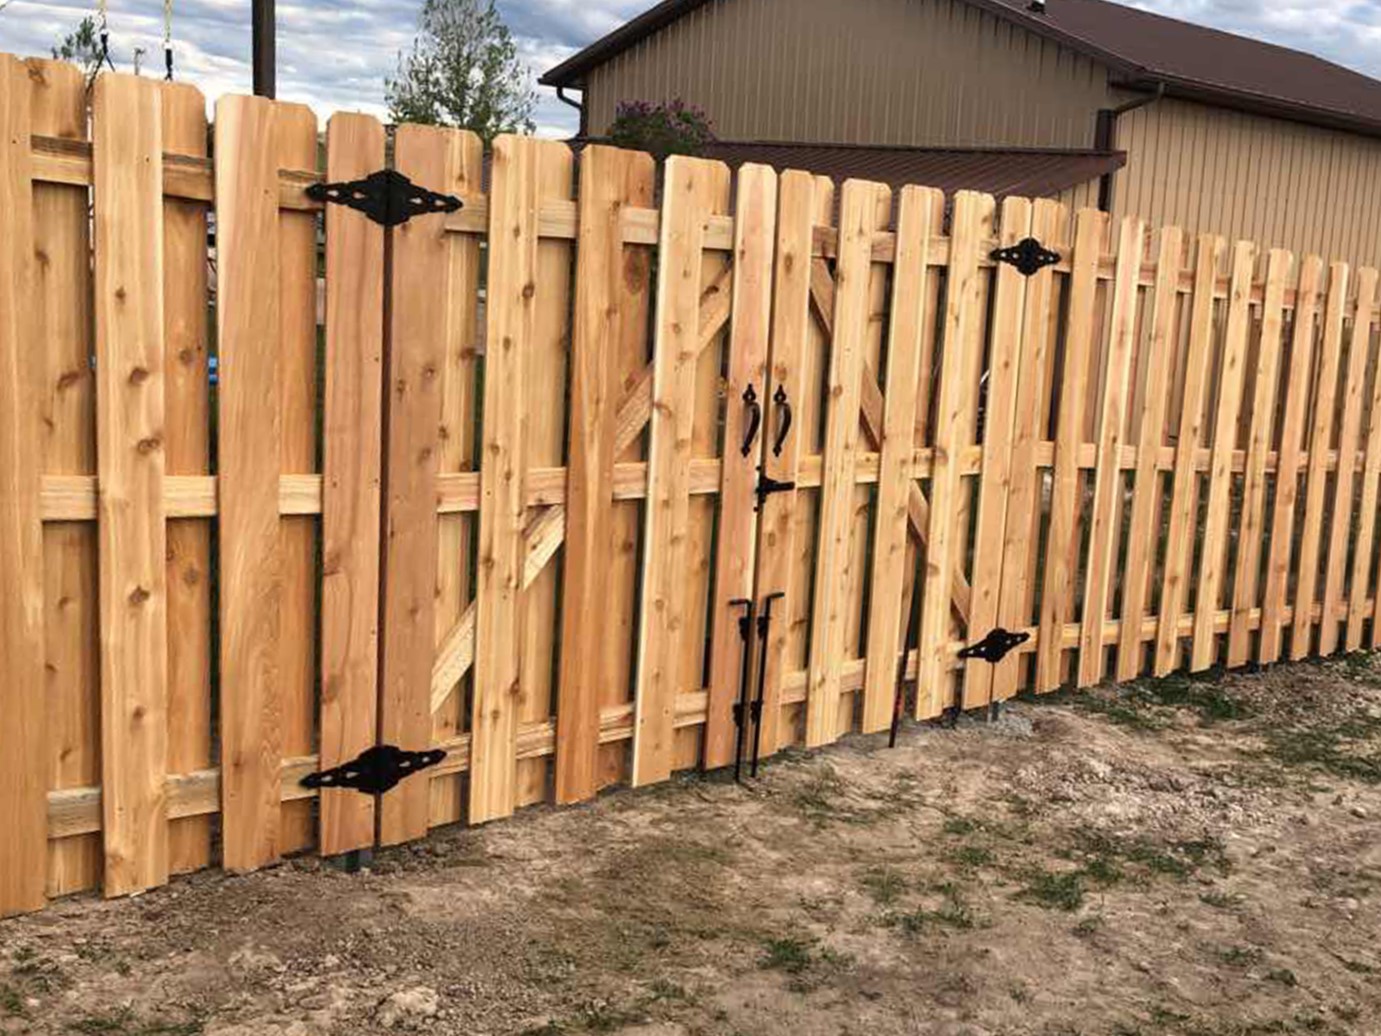
While the gate is still secured to the fence, put the hinges on. Center the hinge on the gap. We suggest a gap of a quarter inch on the hinge side and ½ inch to ⅝ inch on the side with the latch to give it enough space. With the Postmaster posts, the hinge connection is going through the metal, which is a helpful factor because it makes it very secure. You can use carriage bolts to make it extra strong.
Now that the hinges are on, take the screws out that were there temporarily. This is much easier than taking the screws out earlier in the process, and everything should line up perfectly. If the gate is close to the ground and doesn’t swing freely, this is the time to trim just a little bit off the bottom.
Attach the Latch
Put a latch in the two-by-four that is at the opening of the gate. It’s very important to put the catch for the latch at the center of the two-by-four. Screw it into the gate and right through the rail. Drill through the Postmaster post for the latch and use carriage bolts to attach it. If the two-by-four isn’t trimmed down there will be too much extra wood and it could eventually split. At this time, an anti-sag cable can be attached to the gate.
Simplify Your Gate Construction with Postmaster Posts
Building a cedar wood gate with Postmaster posts is a fantastic way to create an eye-catching and durable entrance for your property. The combination of cedar’s natural beauty and Postmaster posts’ strength provides a gate that not only enhances the aesthetics of your property but also withstands the test of time. SWi Fence & Supply is your source for all of your Wyoming wood fence supplies including Postmaster products. By following the step-by-step instructions outlined in this article, you can successfully construct a cedar wood gate that will serve as a welcoming and secure entryway for years to come.
Count on SWi for your Wyoming Wood Fence Supplies!
Whether you’d like our team to build your fence and gate for you, or supply you with our professional materials for you to do it yourself, get in touch and learn why SWi is the top Wyoming fence company! Call us at (866) 754-0120 or contact us online today. Using our instant quote tool is also a great way to get started on your project. Our friendly and knowledgeable fence staff is here to answer any questions you may have regarding cedar wood gate construction for a Wyoming wood fence. We are proud to be a resource you can trust!